Trusted, one patient at a time.
The best account of treatment comes from the people who have been through it, and from the surgeon showing what was done. Everything here is in their own words.

To describe my most recent visit, I would say it has changed my life.
Last year I had an implant operation. It entailed the removal of all of my teeth.
If ever I felt upset or worried about anything at all, I could ring them. They would always be there to answer any questions.
We are all human, and I felt that human touch.
Five cases, as Dr Brad describes them.
Not every patient wants to be filmed. Where someone has agreed to share their X-rays or photographs, the case is described by Dr Brad — what was done, in his own words, and nothing more.
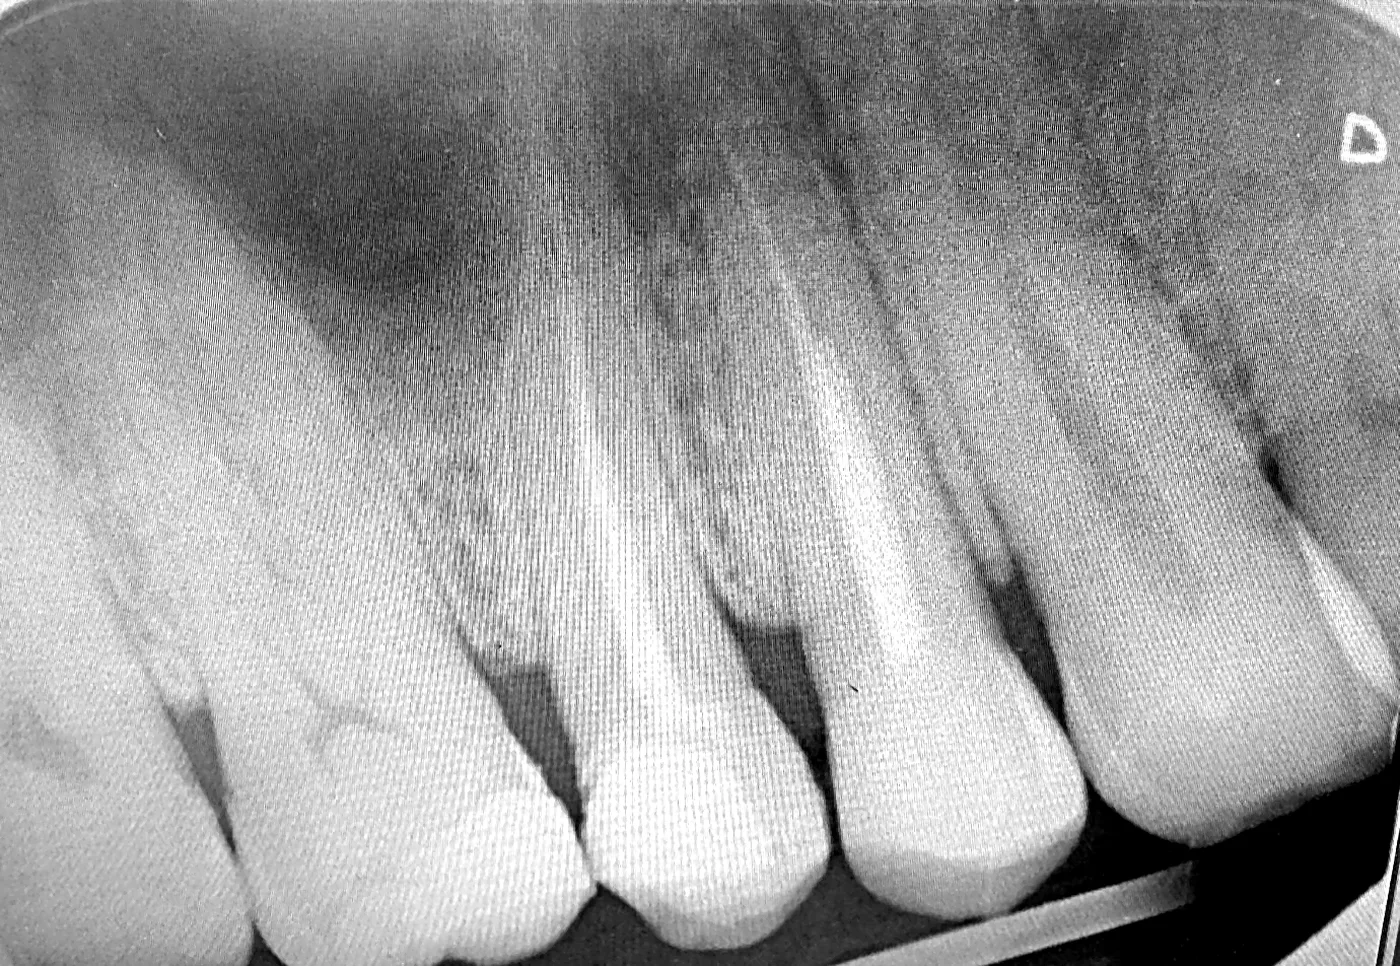
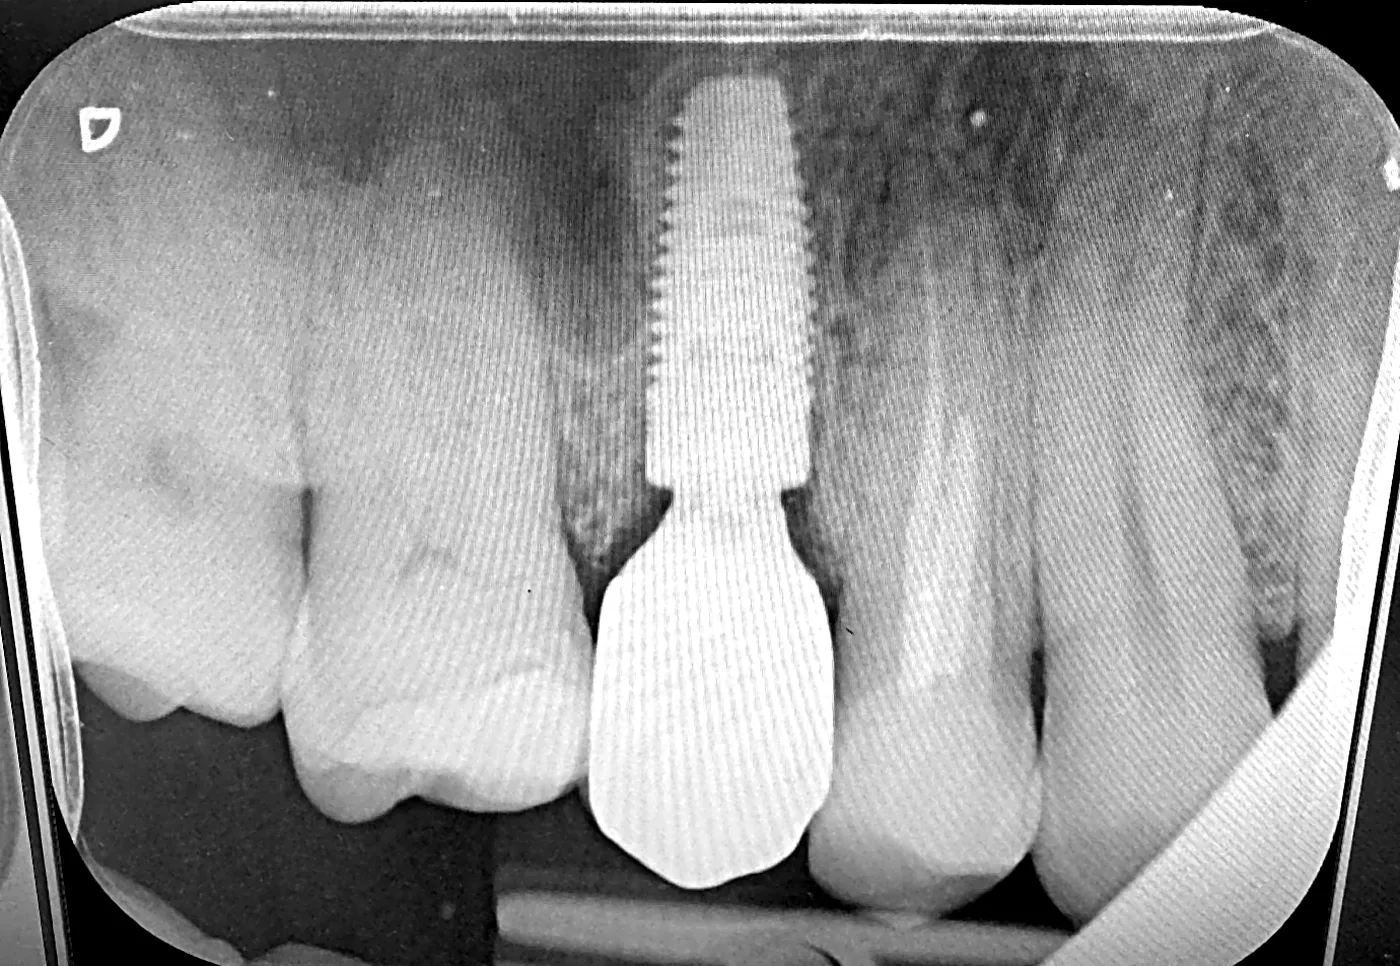
Extraction, immediate implant with sinus lift, and a single crown.
See all four steps Hide the steps
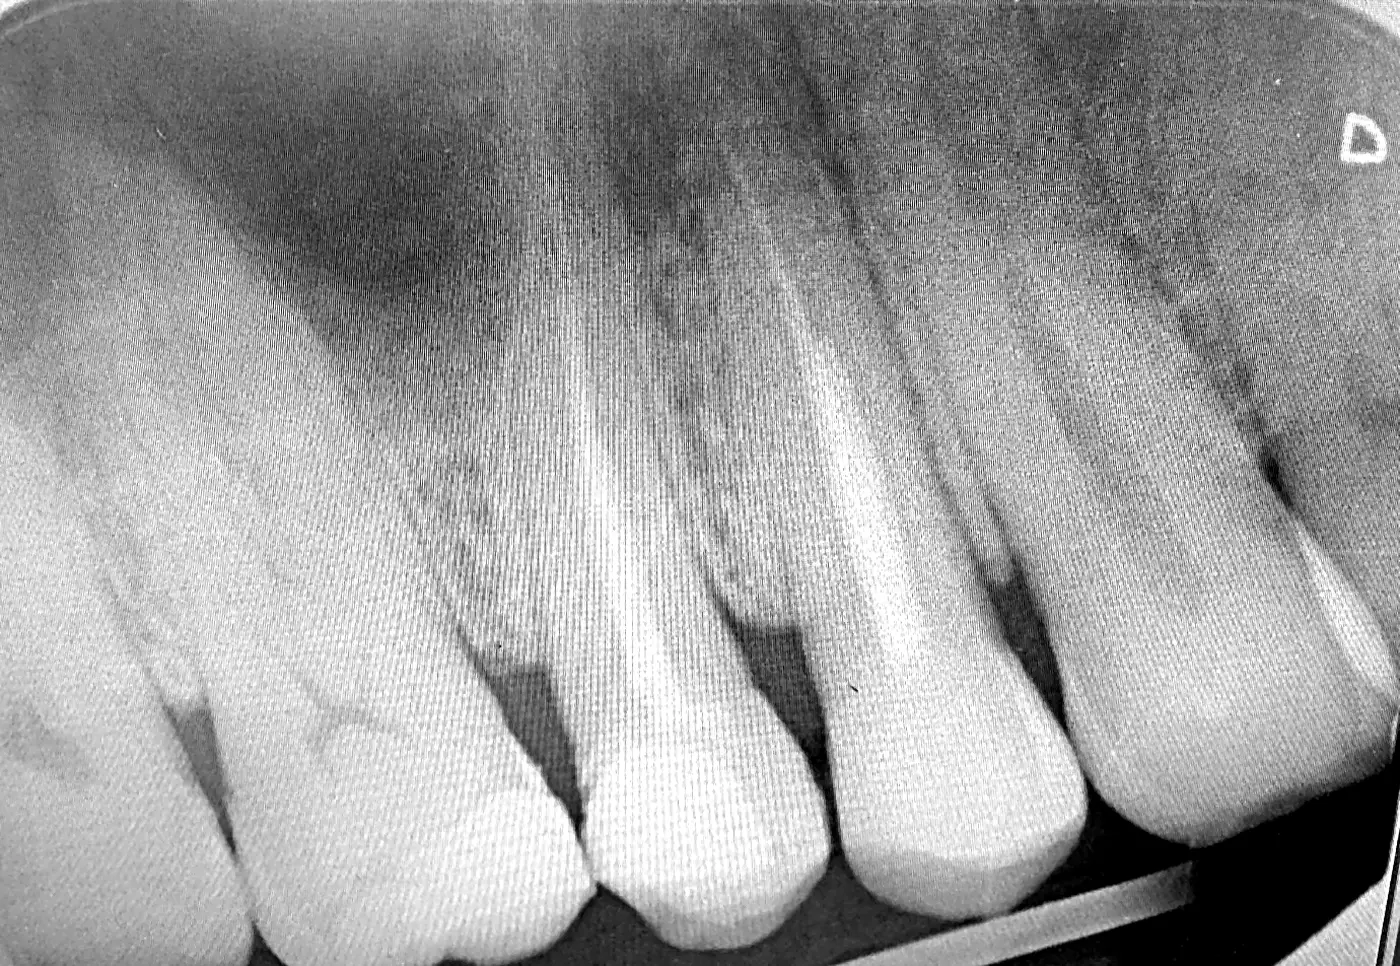
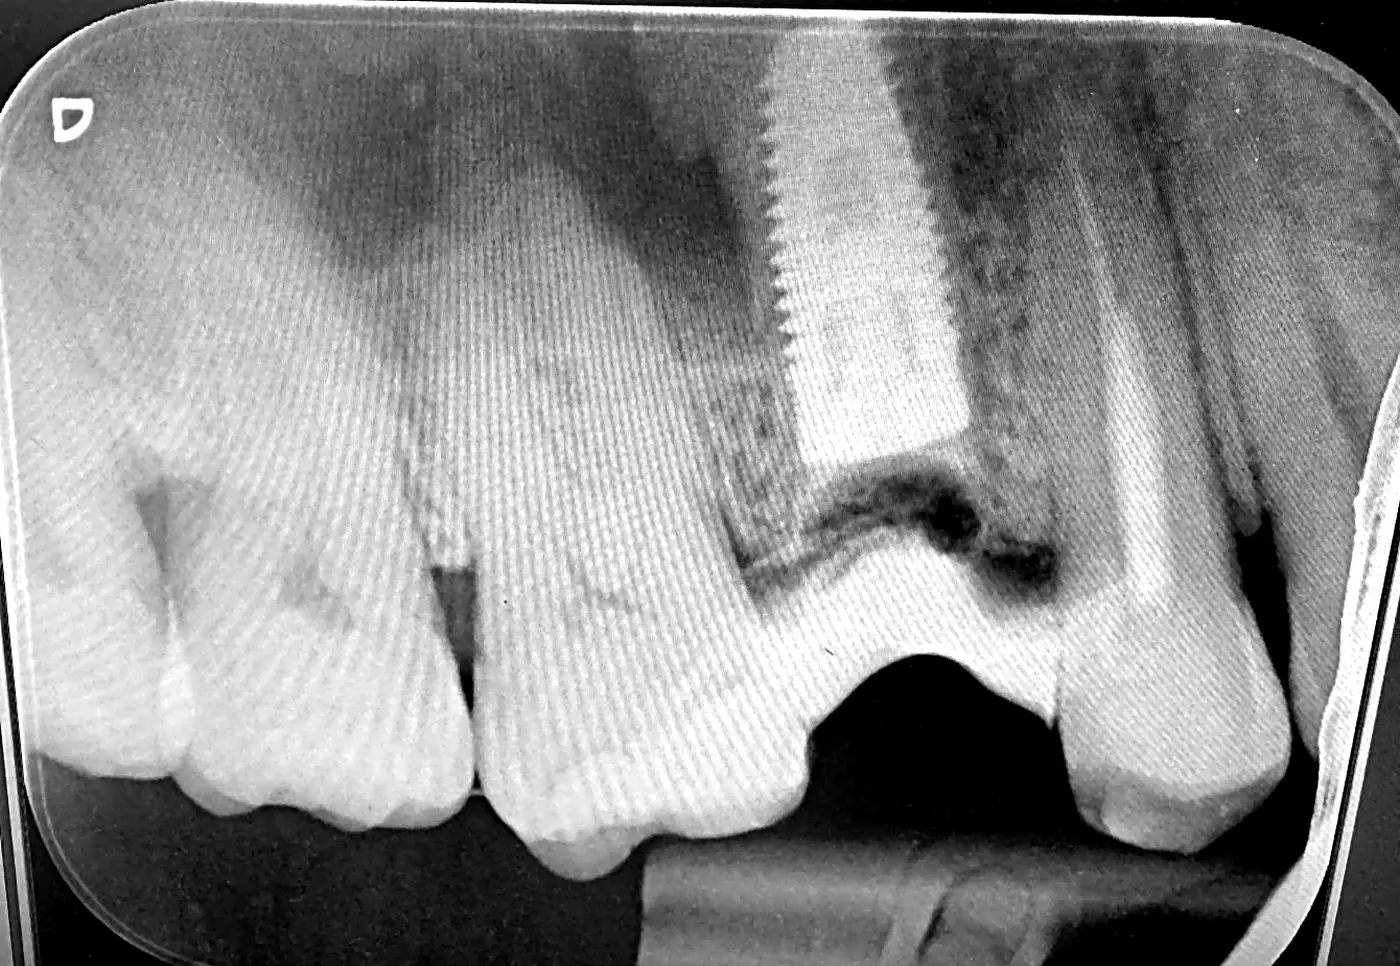
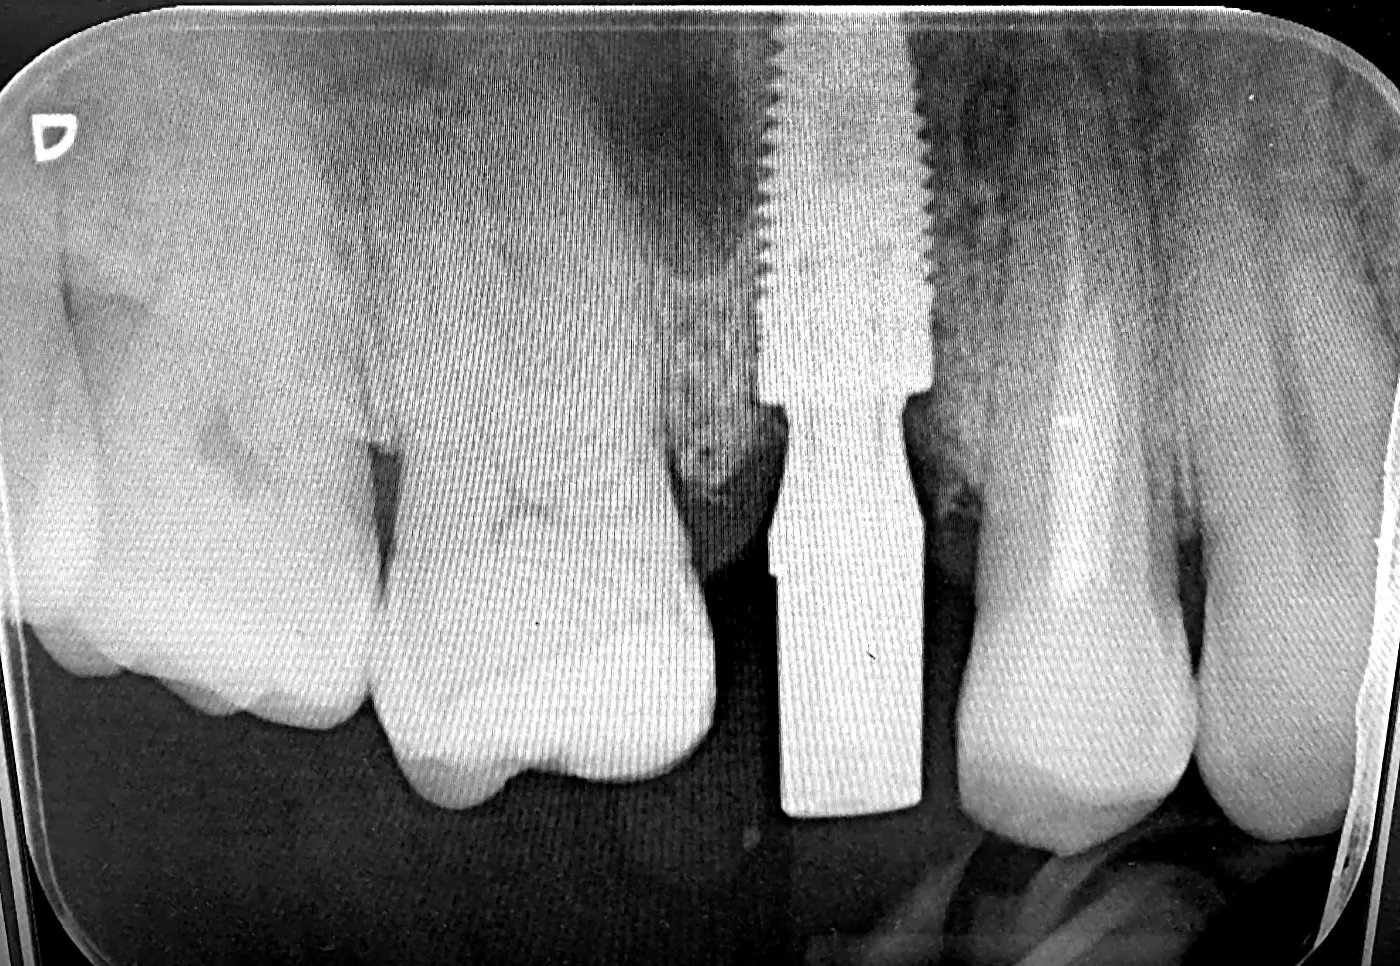
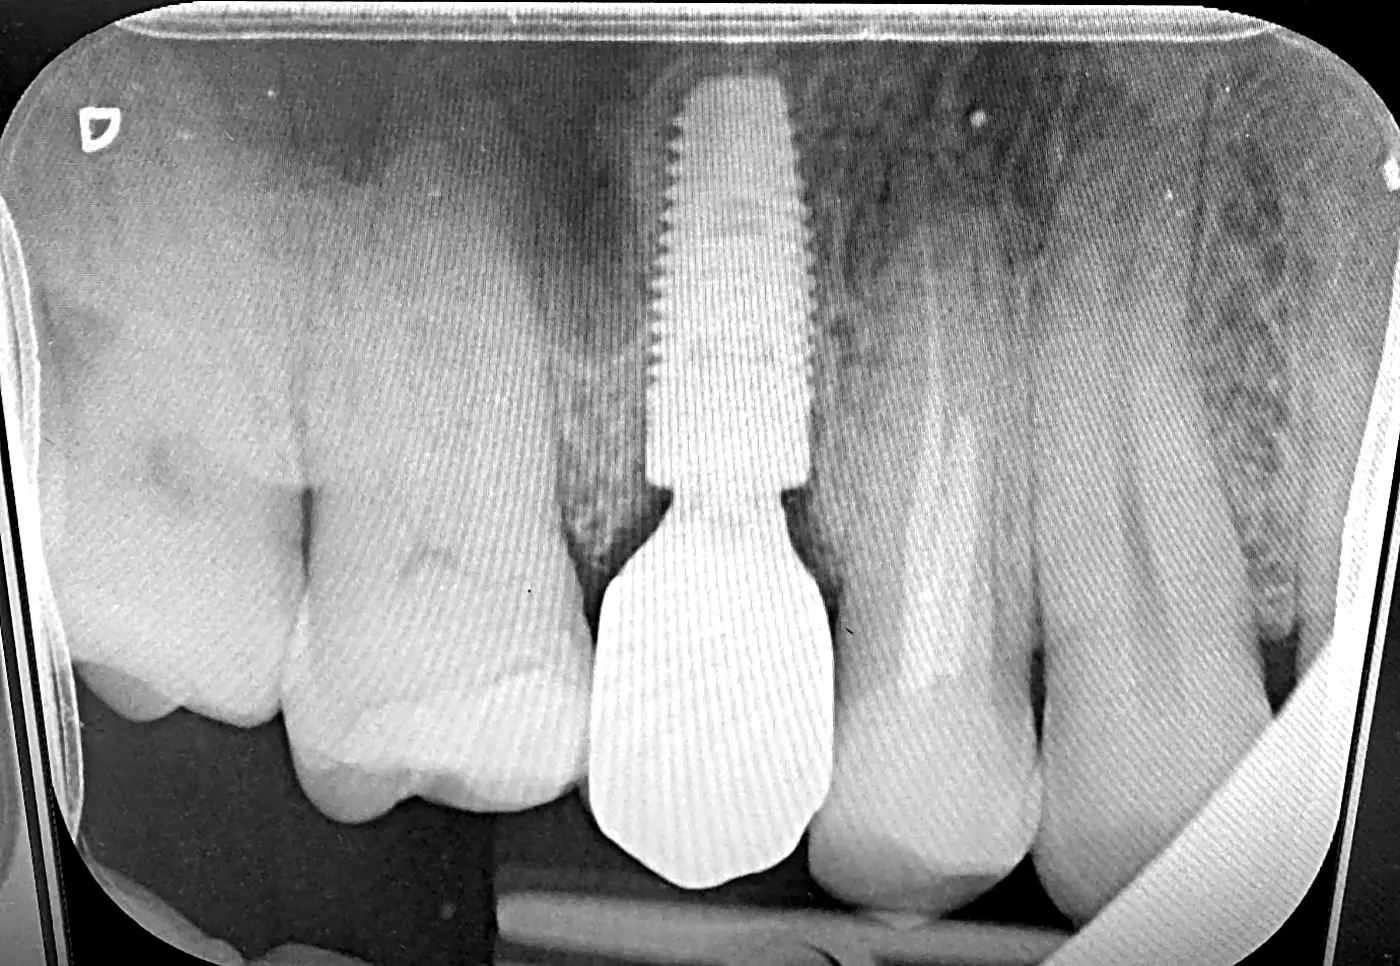
- Sinus Root fillings Broken tooth Step 1 · Before
The starting point
Two root-filled teeth. The left one broke off, so the tooth had to come out. The big black area above is the sinus — an air cavity in your jaw.
-
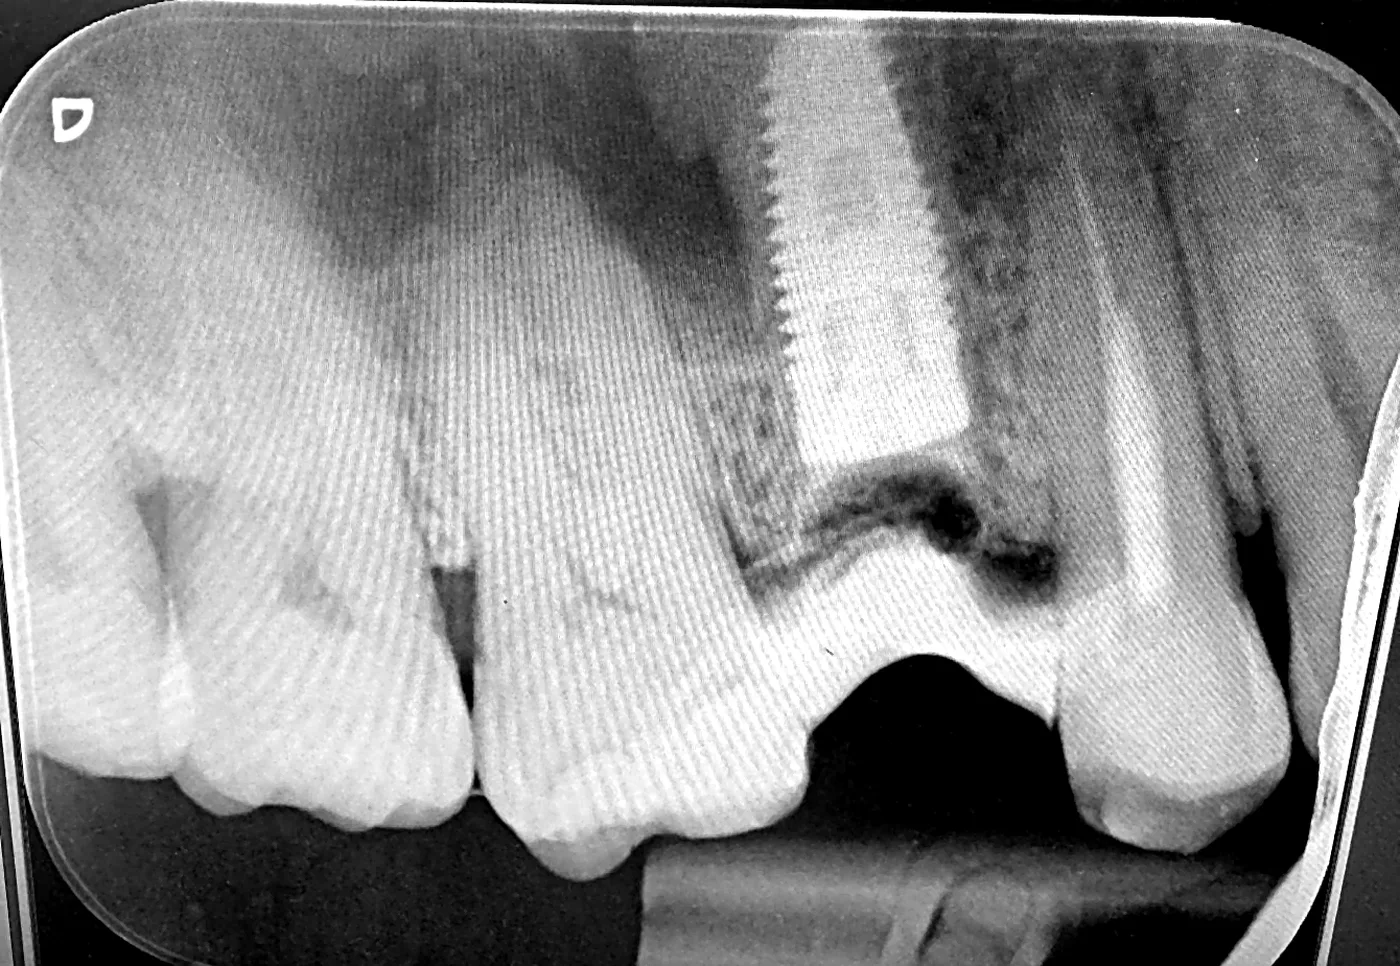 Bone graft Sinus Implant Step 2 · Same day
Extraction and implant
The tooth out, the implant placed. That white area at the top of the implant is the bone graft — the sinus lift.
-
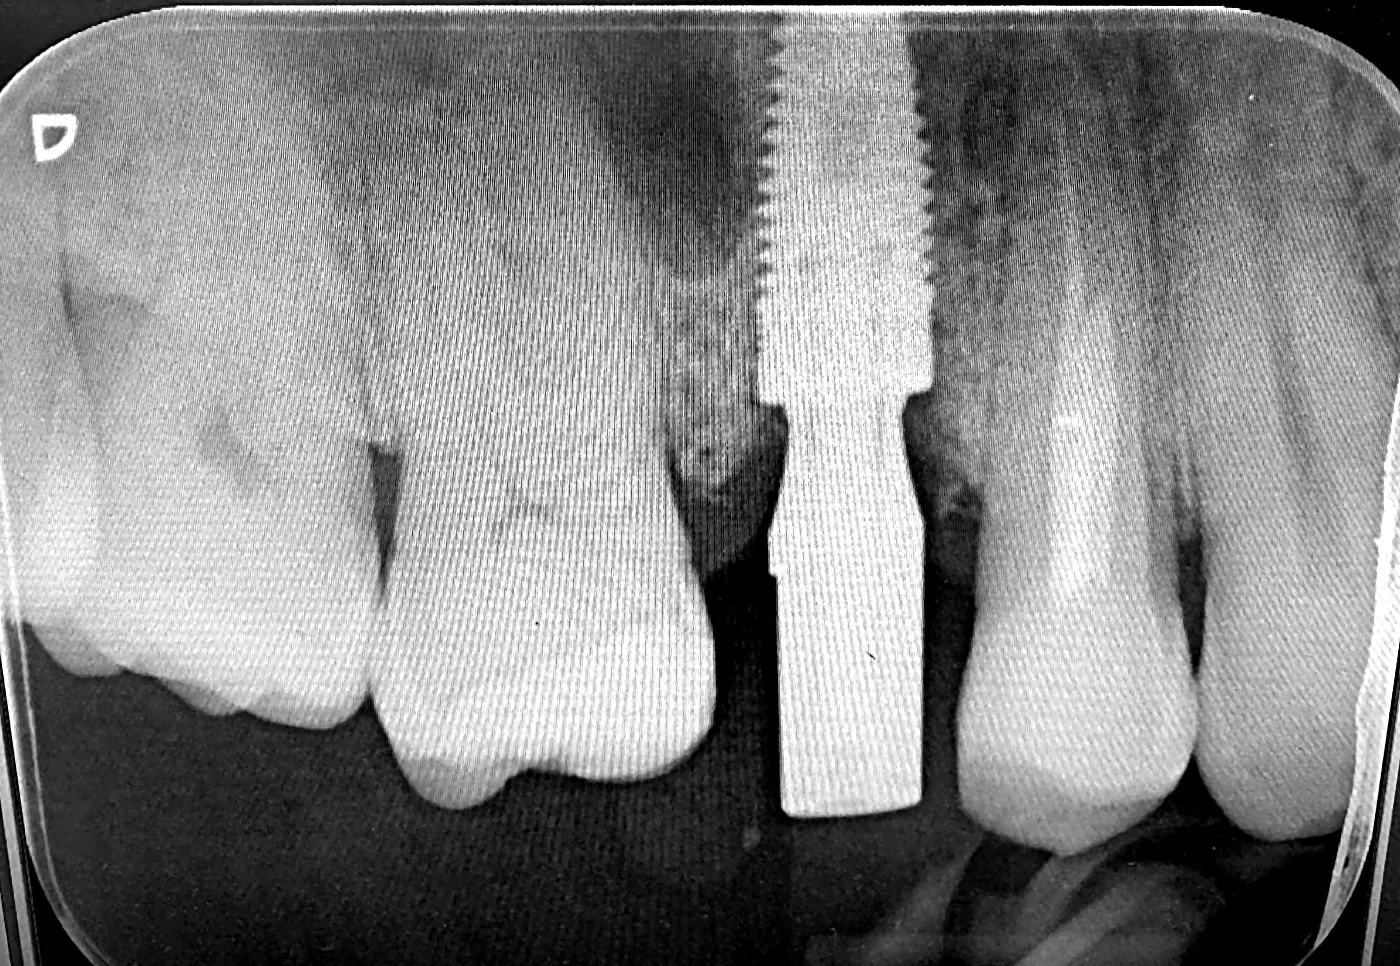 Implant Scan body Step 3 · Digital scan
Scan body in place
A scan body, which is what we use for the 3D digital scan, to scan the position of the implant.
- Implant New crown Step 4 · Finished
The tooth screwed into place
A single crown, screwed into place.
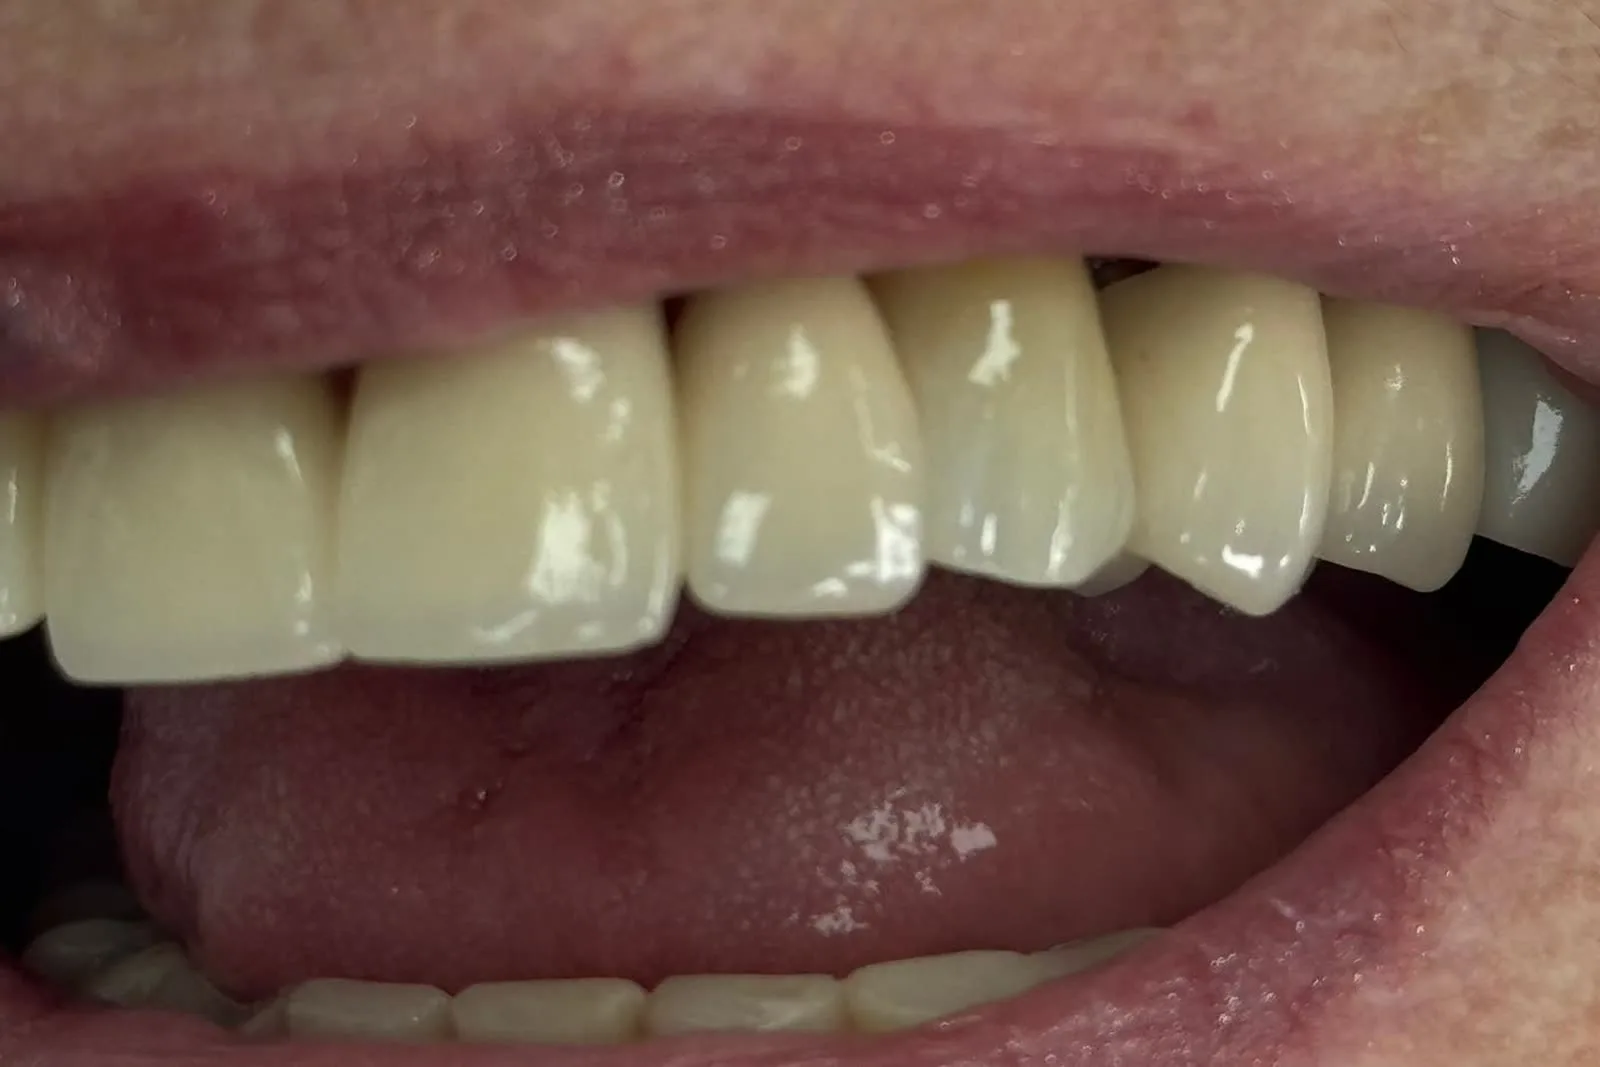
A single implant to replace a broken tooth.
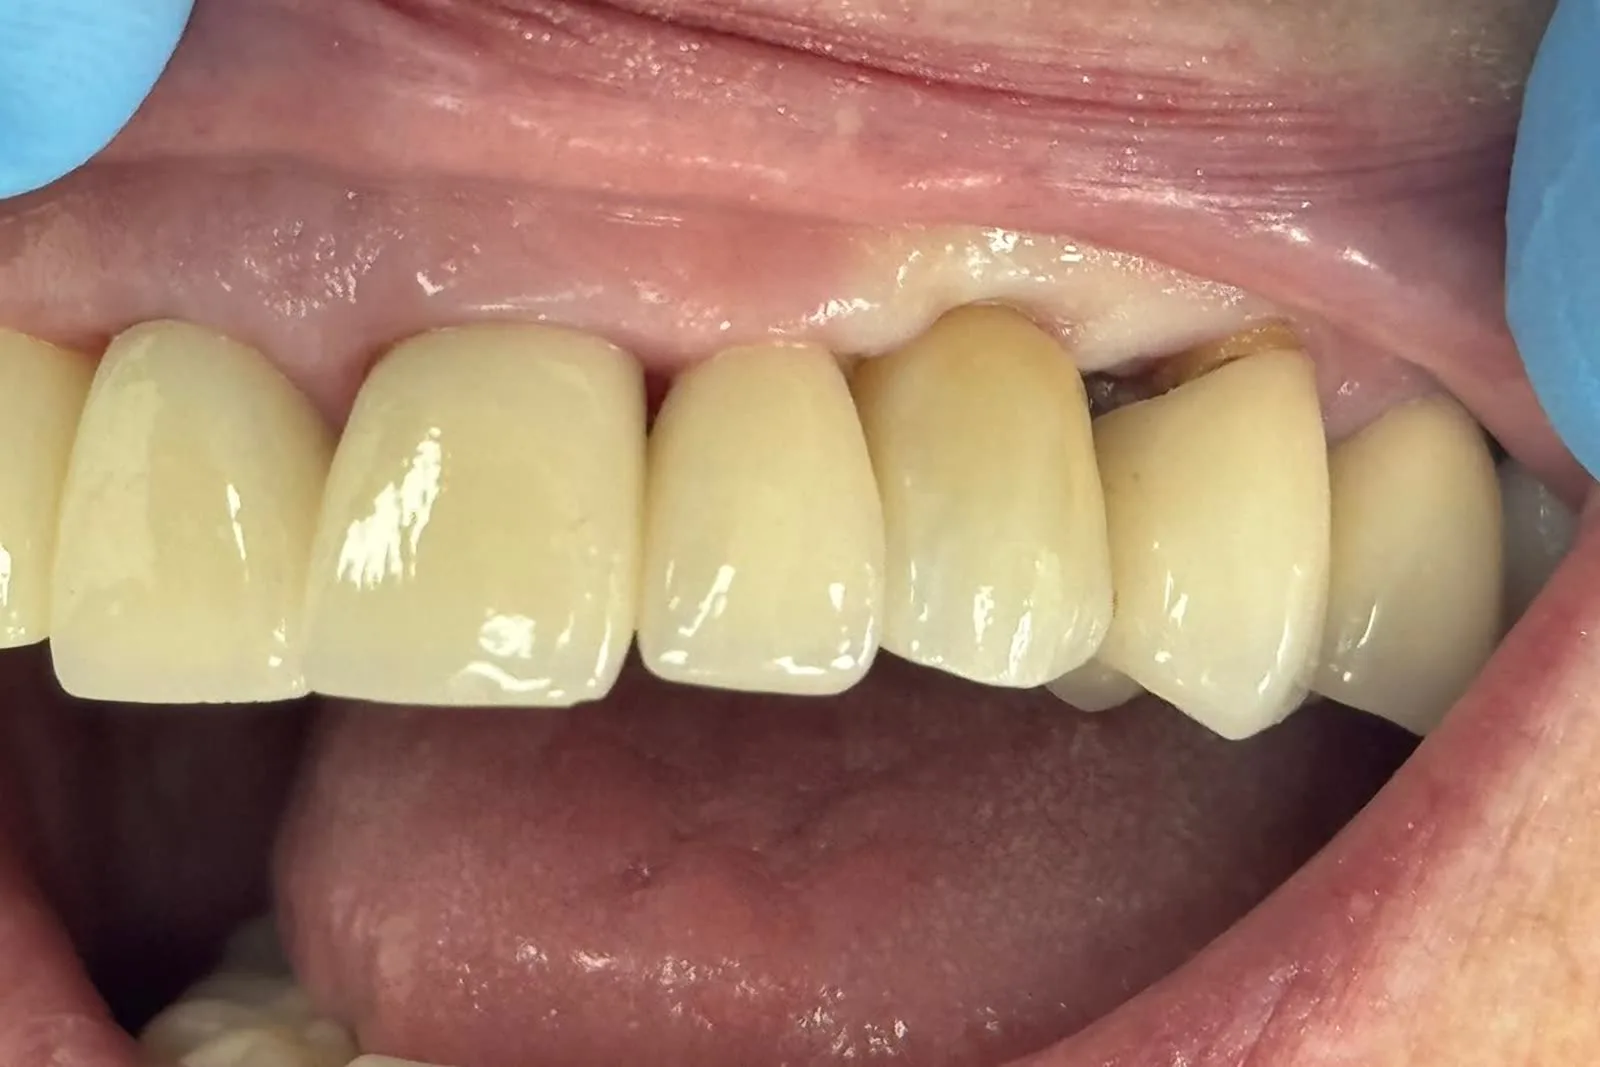
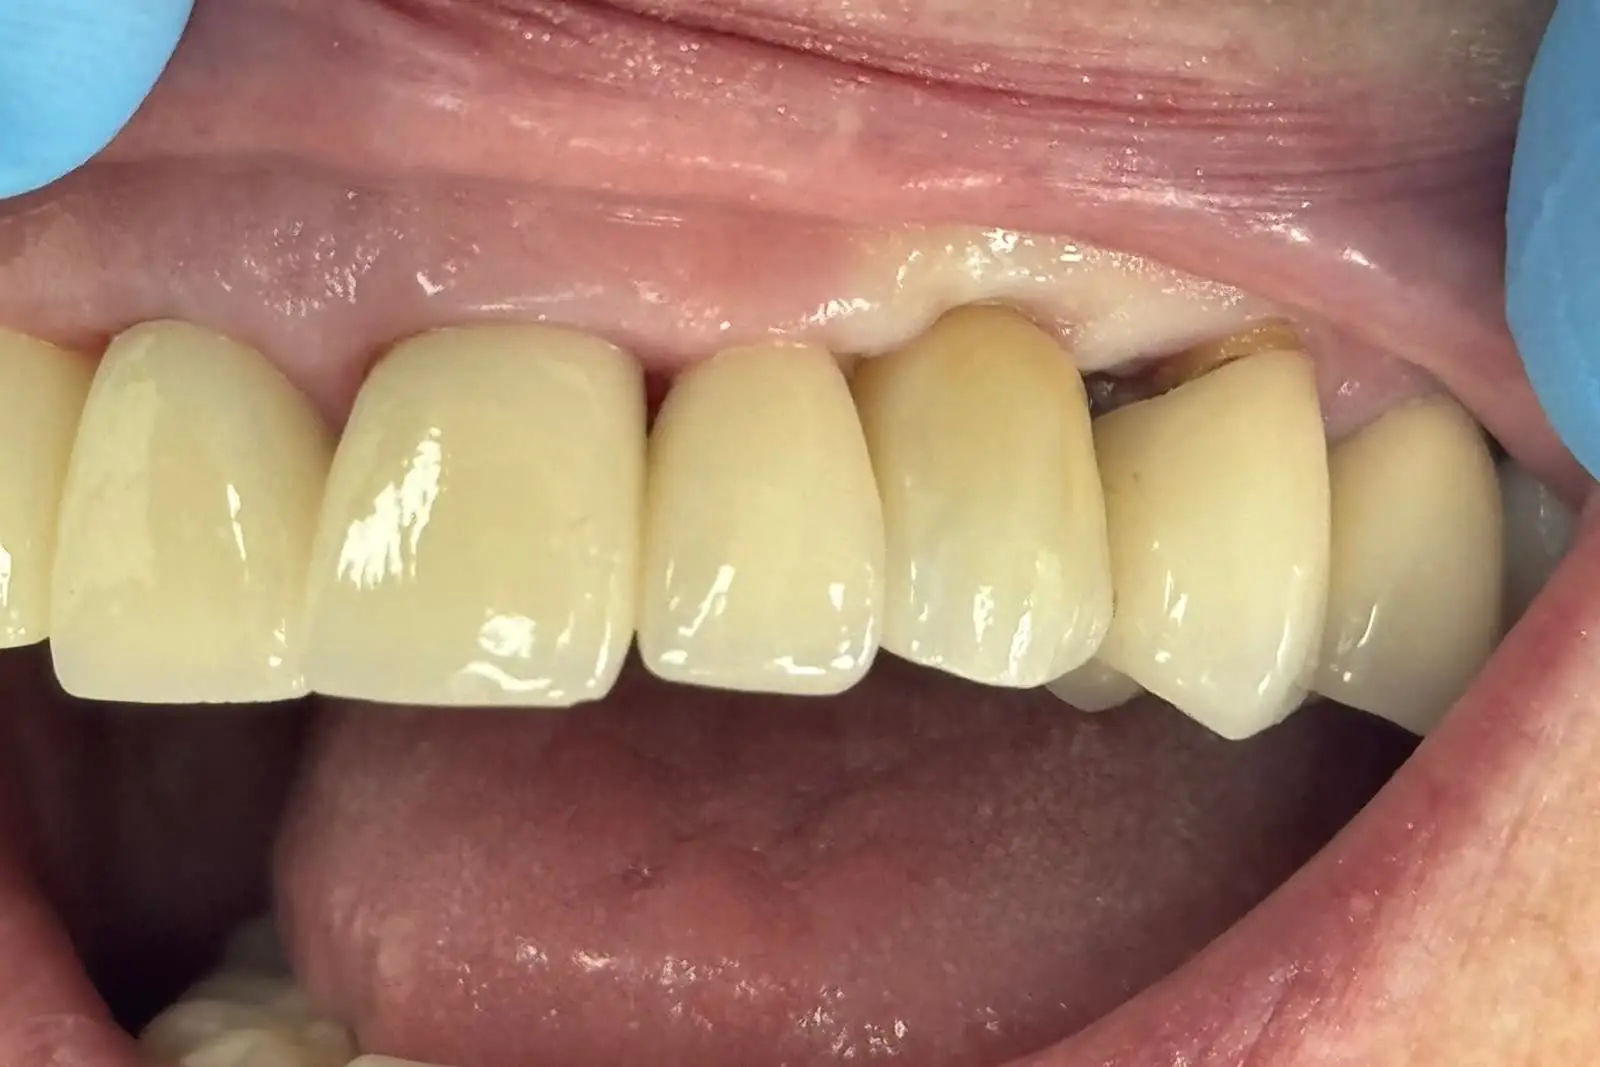
The upper left canine fractured off at gum level and was unrestorable, so the broken root was removed and the implant placed at the same appointment and left to heal, before then making a custom-made monolithic zirconia screw-retained crown.
See all four steps Hide the steps
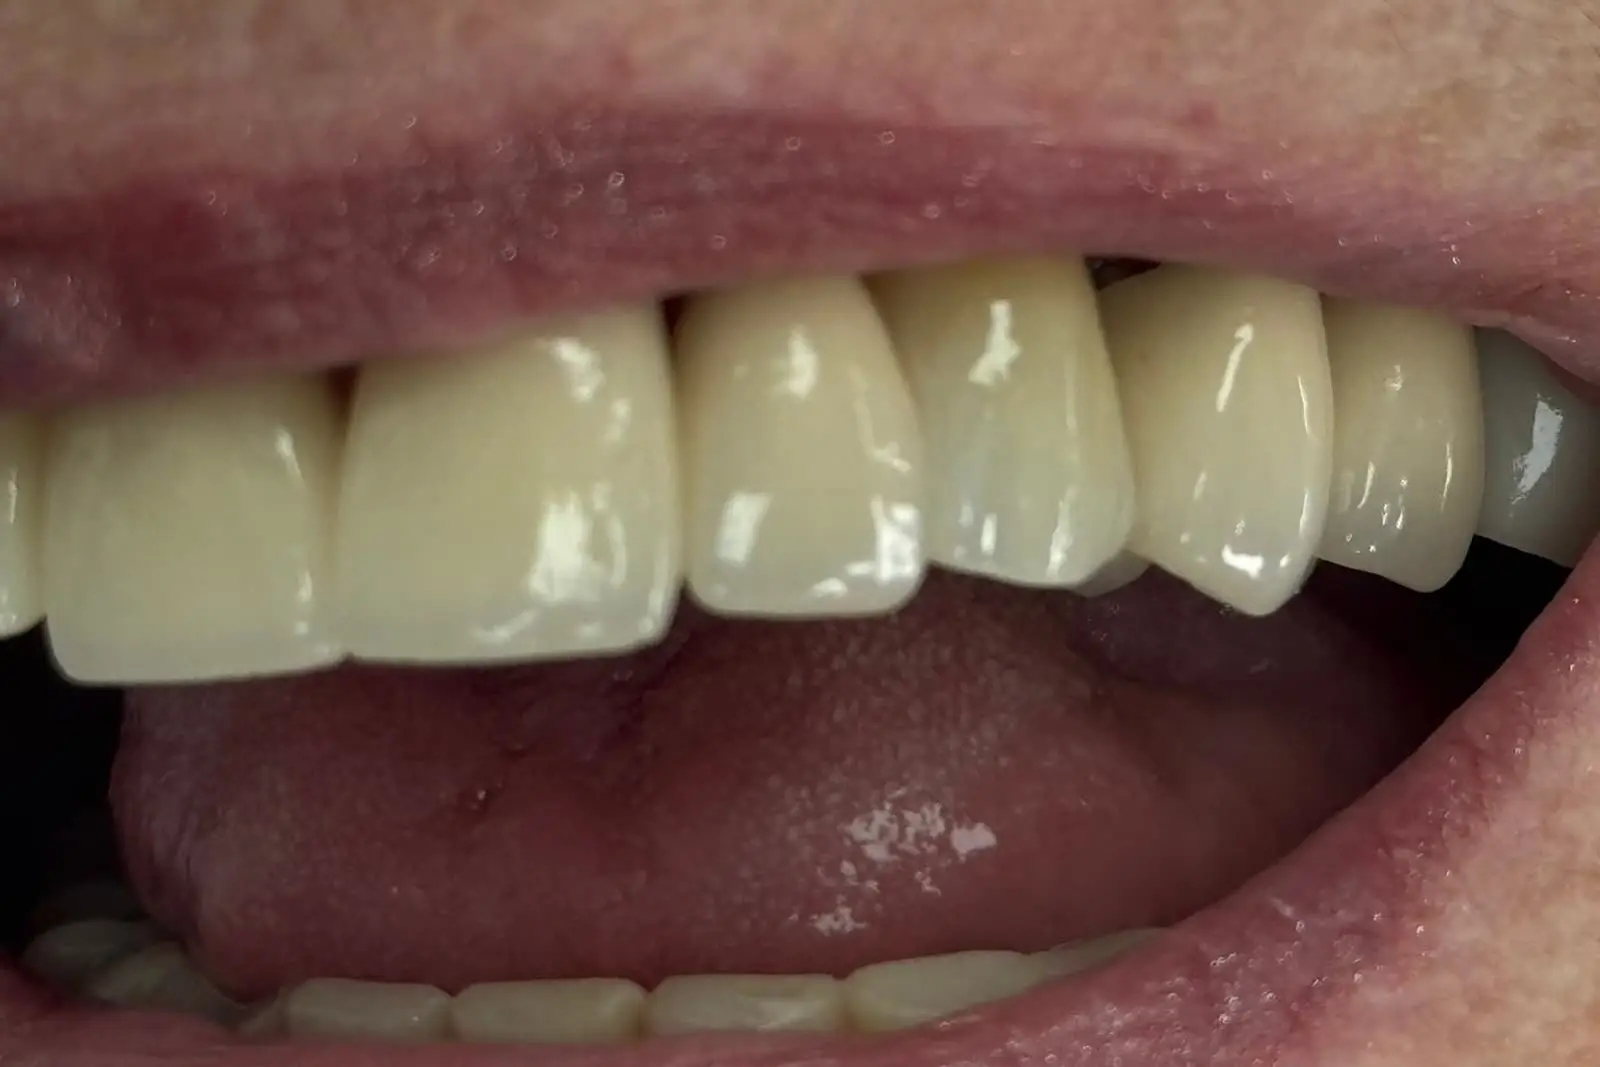
- Step 1 · Before
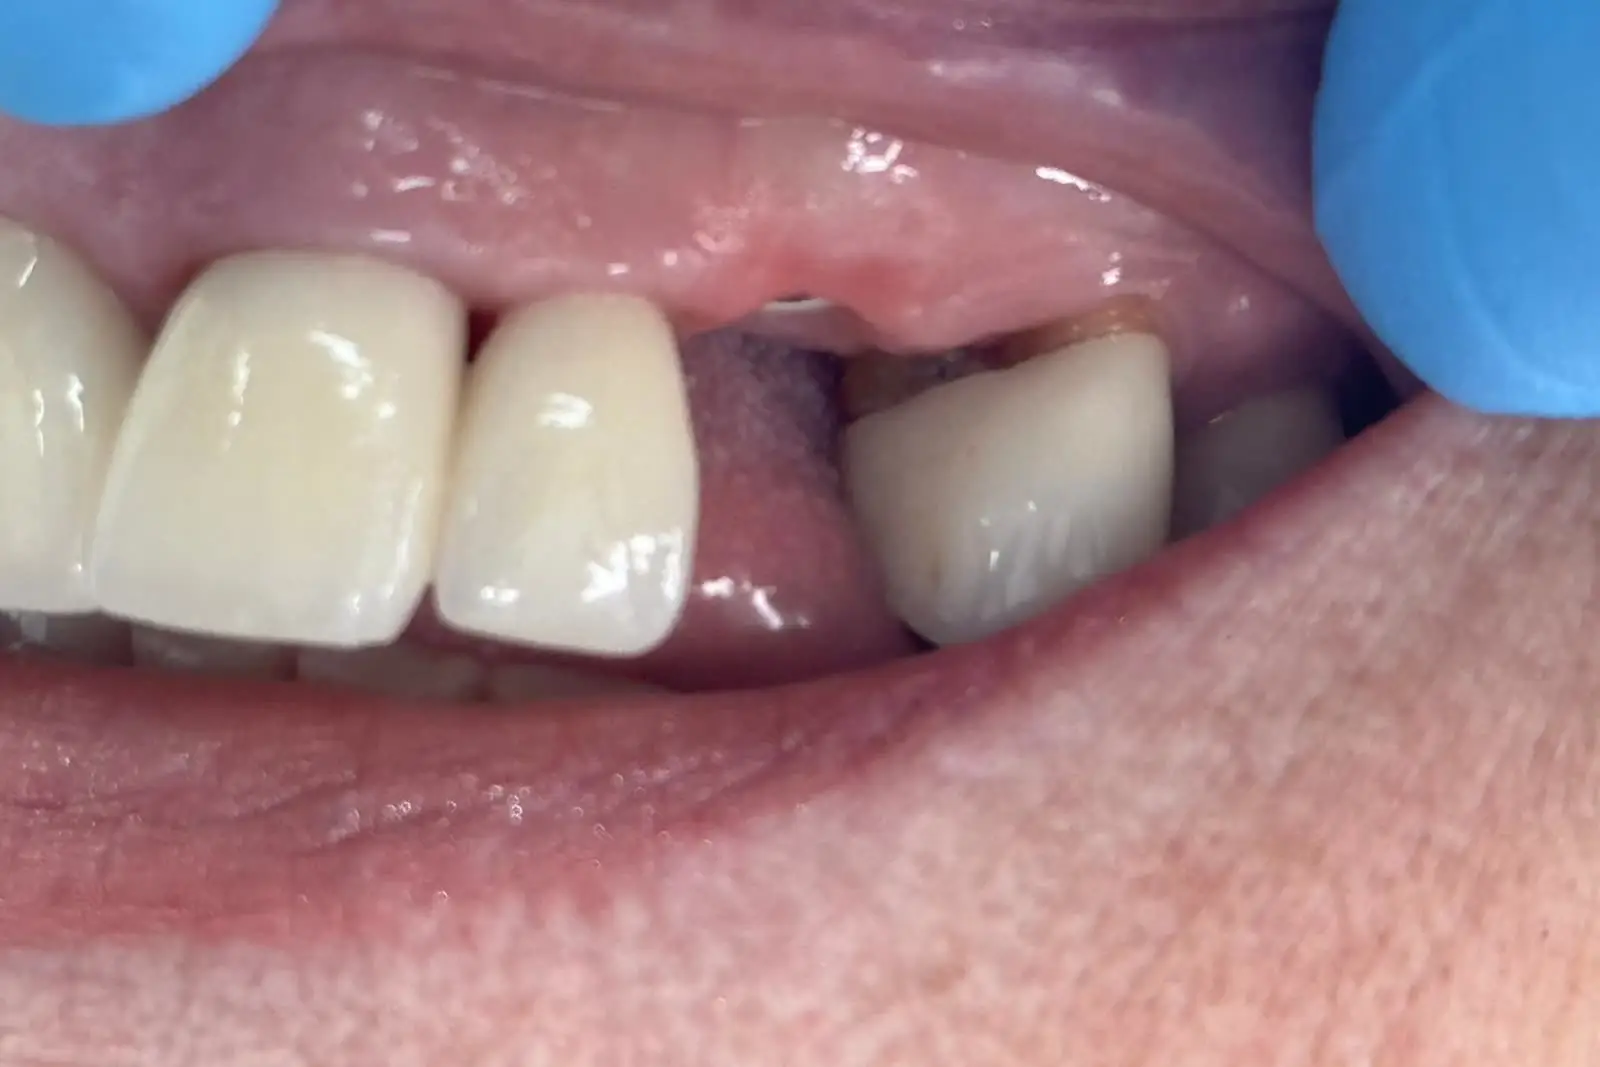
The broken tooth
The upper left canine fractured off at gum level.
-
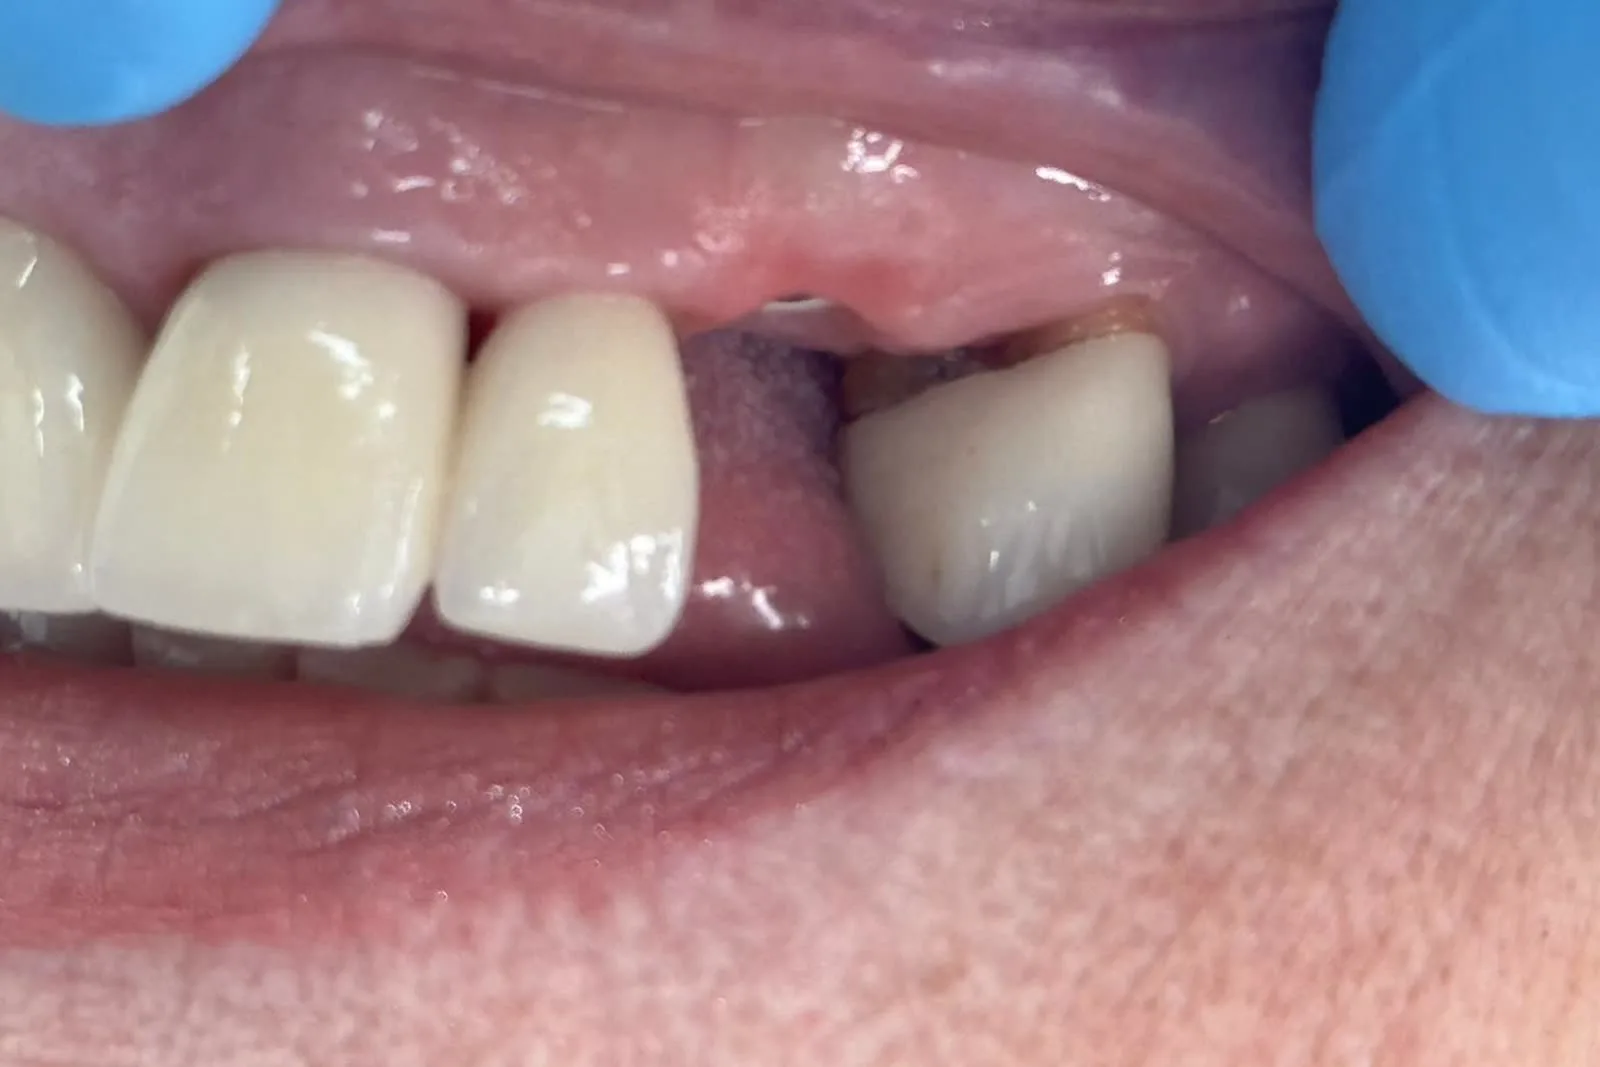 Step 2 · Same day
Root out, implant in
It was unrestorable, so the broken root was removed and the implant placed at the same appointment, then left to heal.
- Step 3 · The crown
Monolithic zirconia
A custom-made monolithic zirconia screw-retained crown.
- Step 4 · Finished
Back in place
The closest replacement options we have to giving them back their own tooth again.
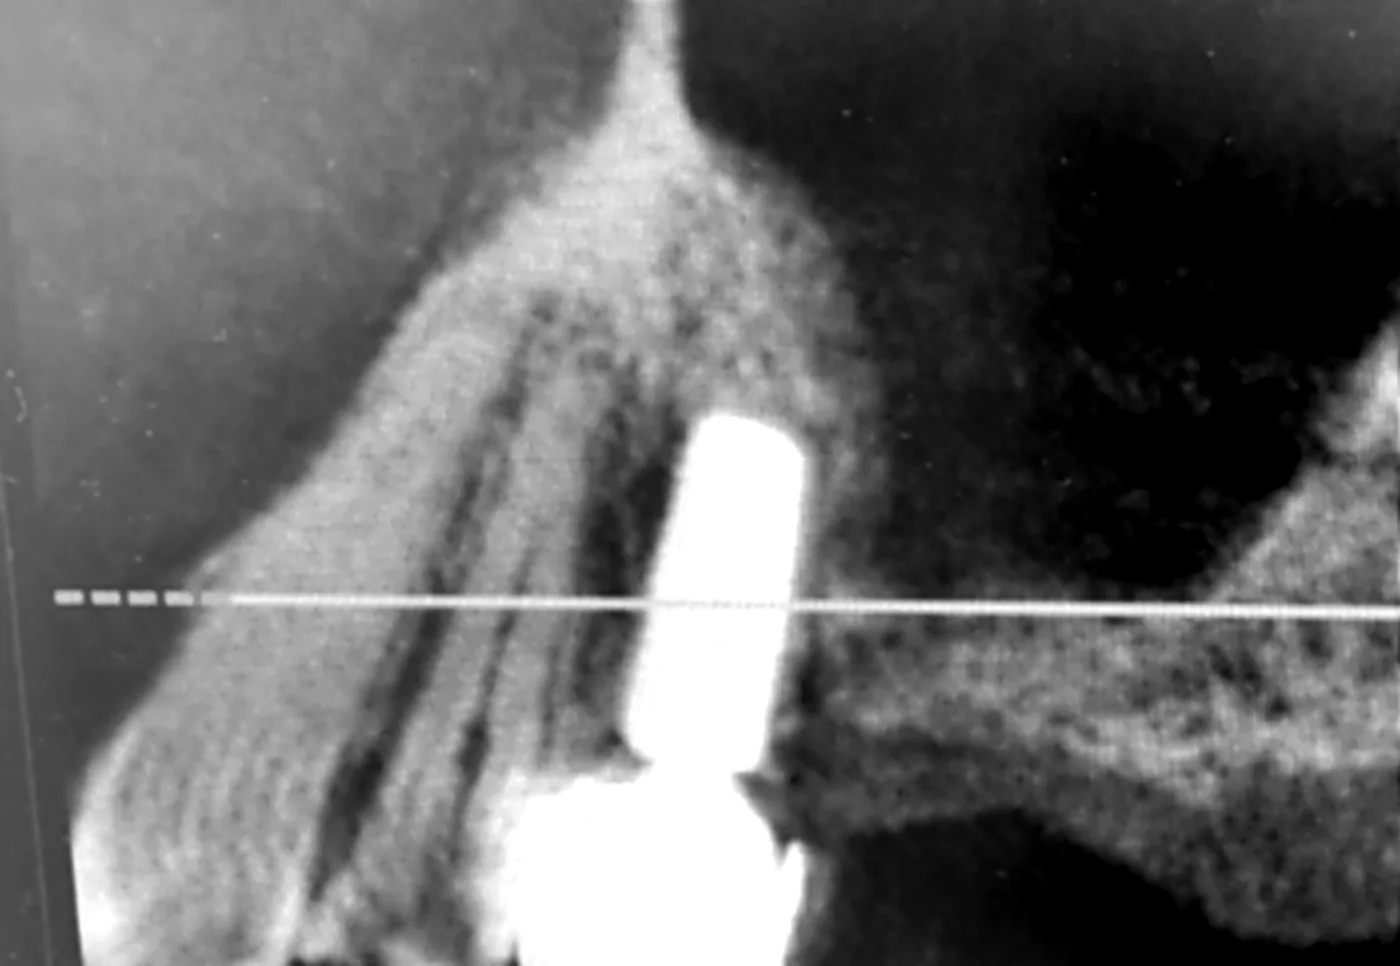
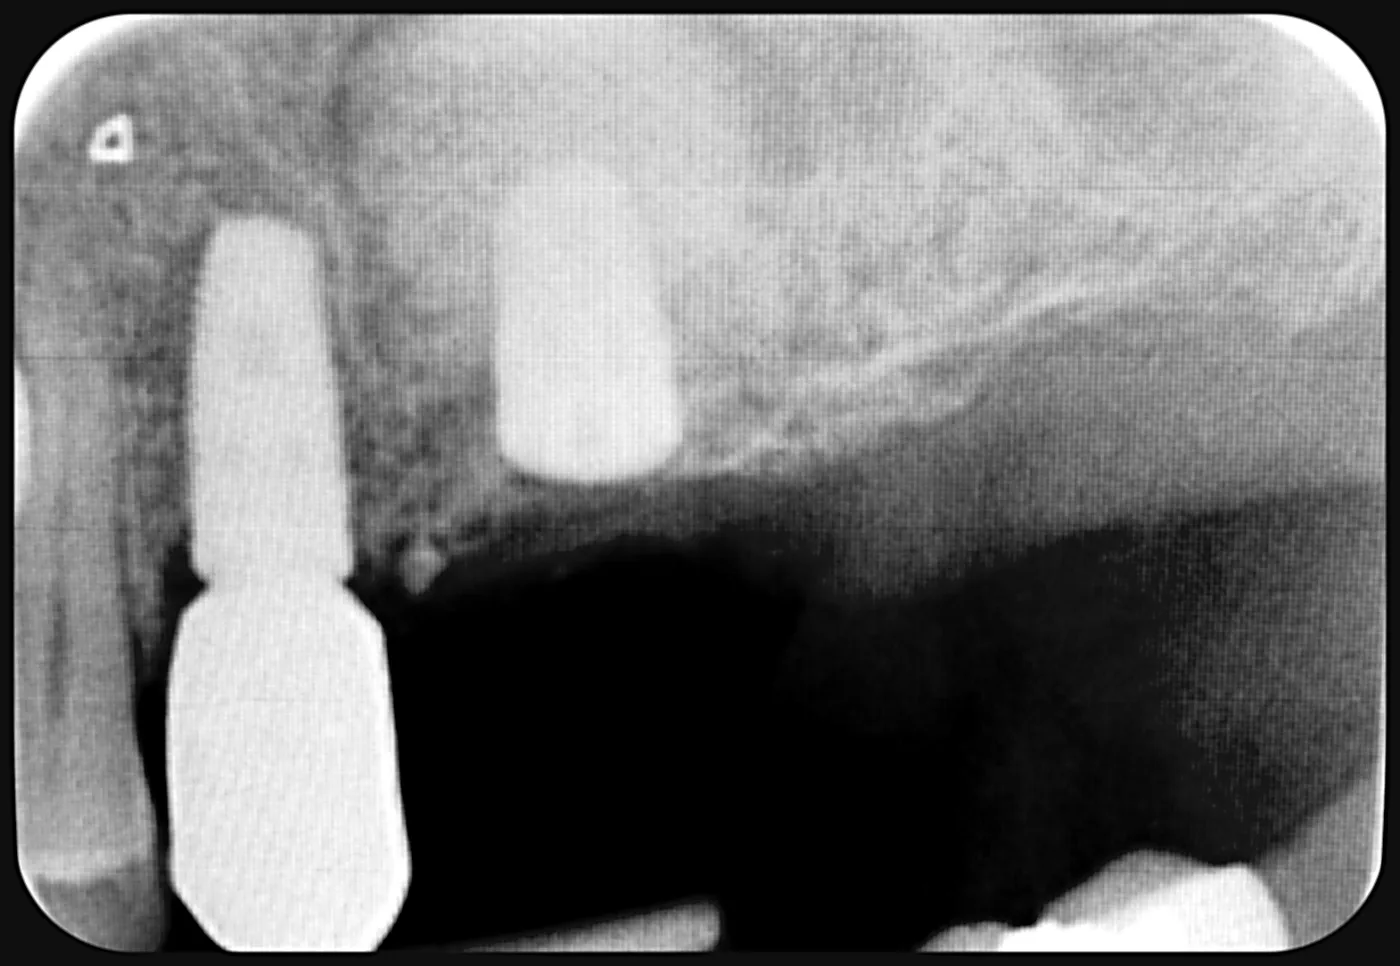
Simultaneous sinus lift and implant placement.
Left to heal for four months, before making a new custom-made crown to restore chewing ability on that side.
See all three steps Hide the steps
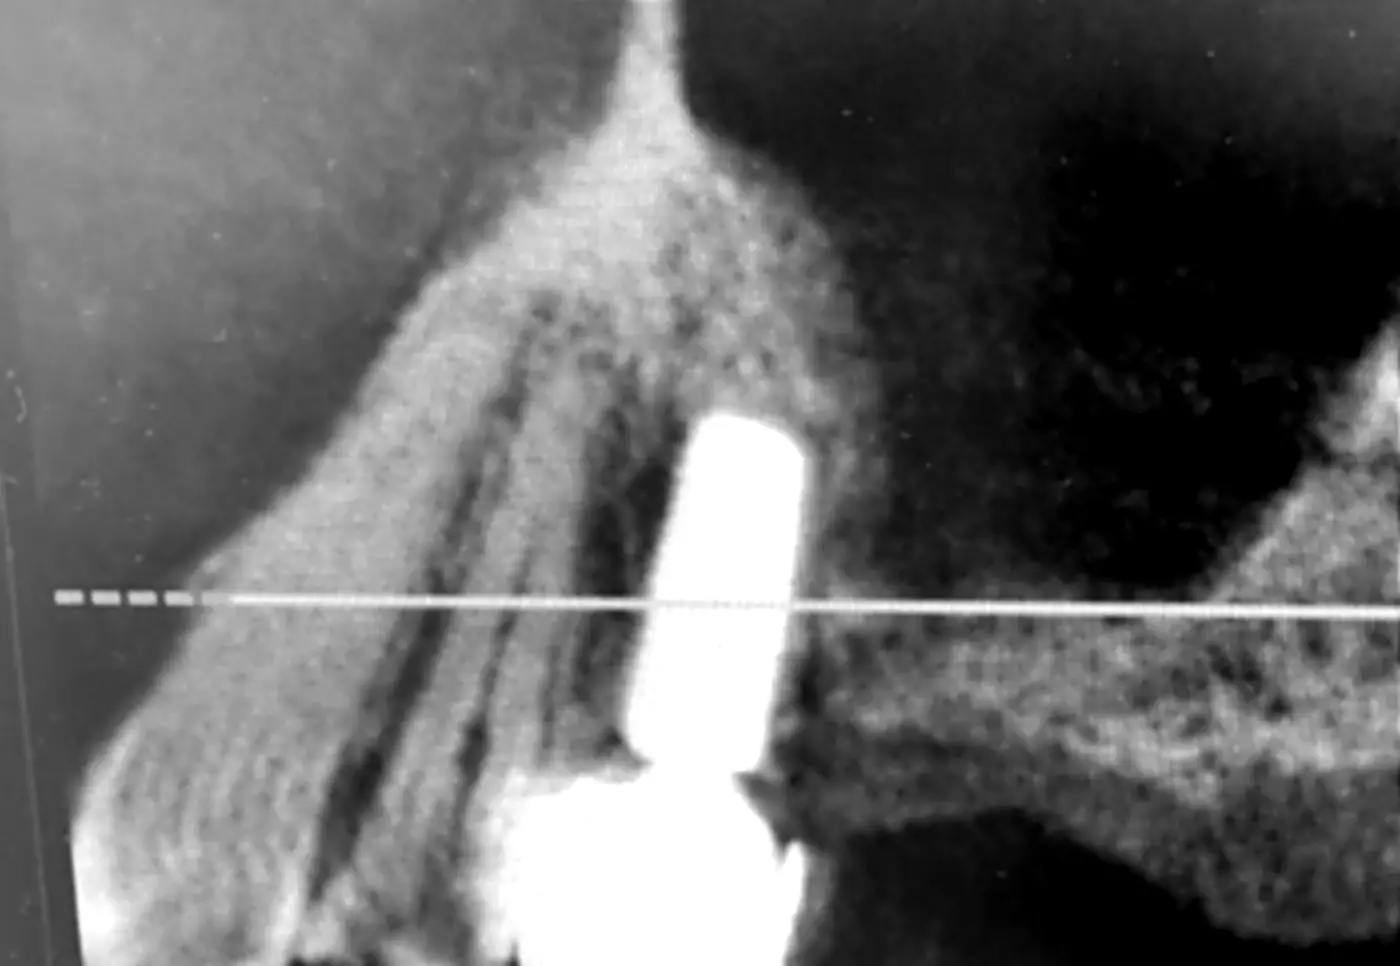
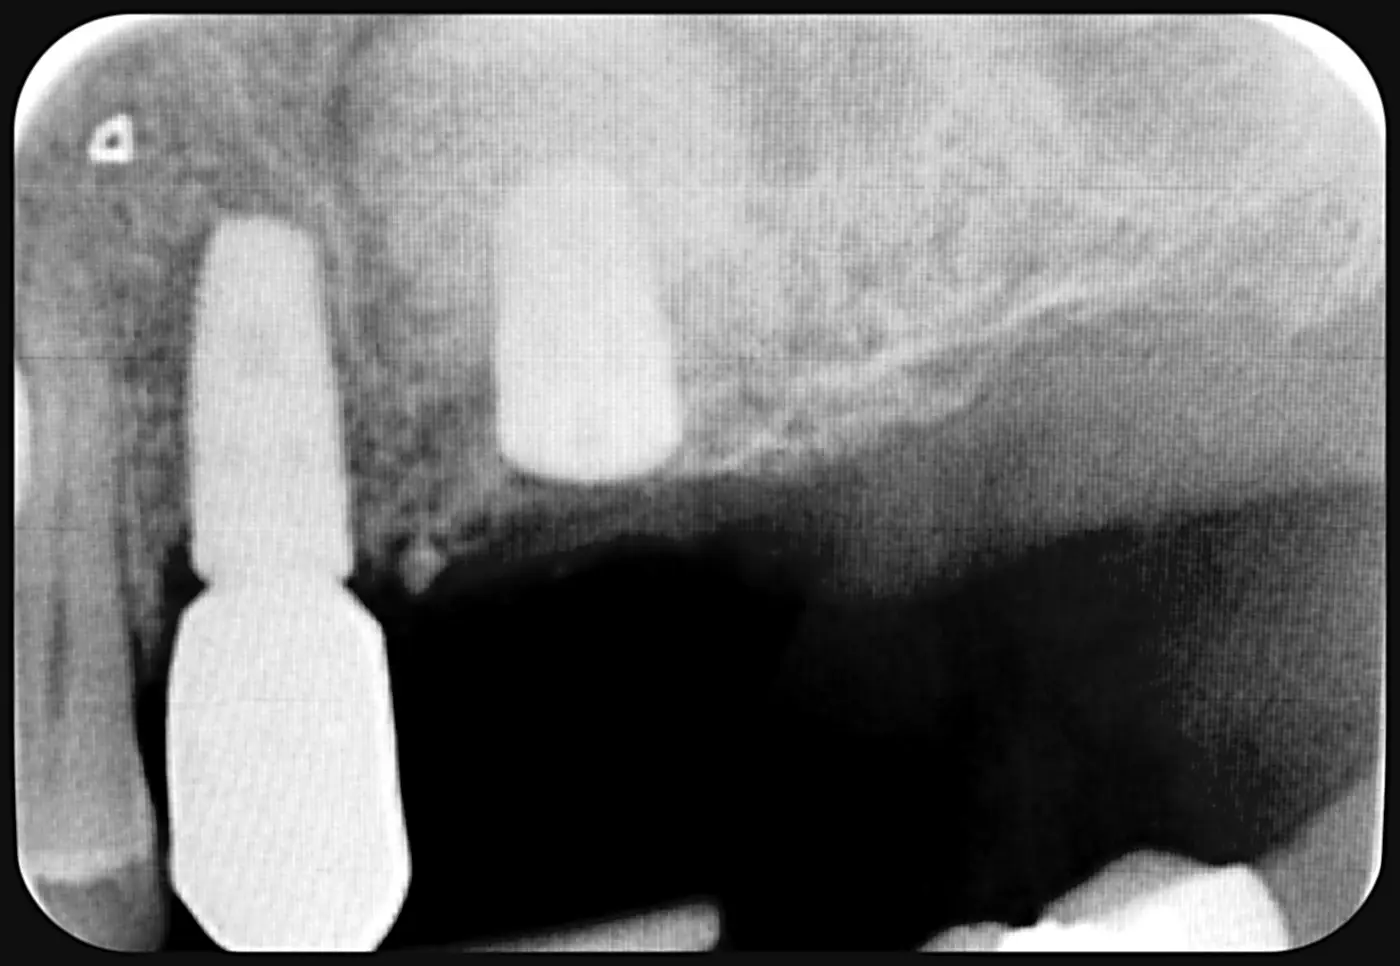
- Step 1 · Before · CT scan
Hard to chew on the left side
The tooth was taken out a little while ago. The patient wanted a fixed tooth for function, and the best option is a single implant.
-
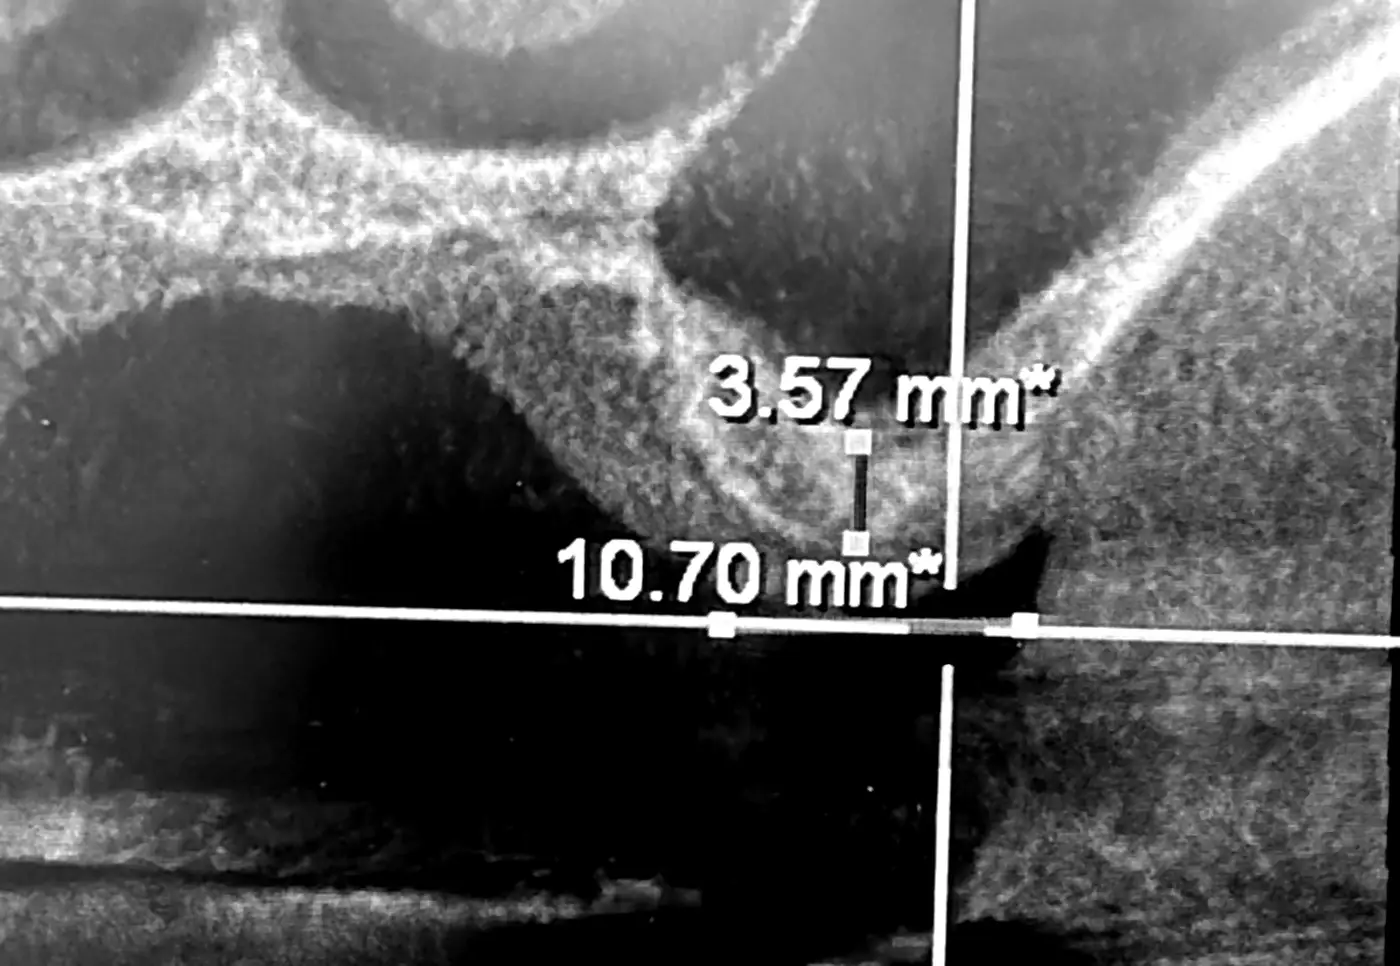
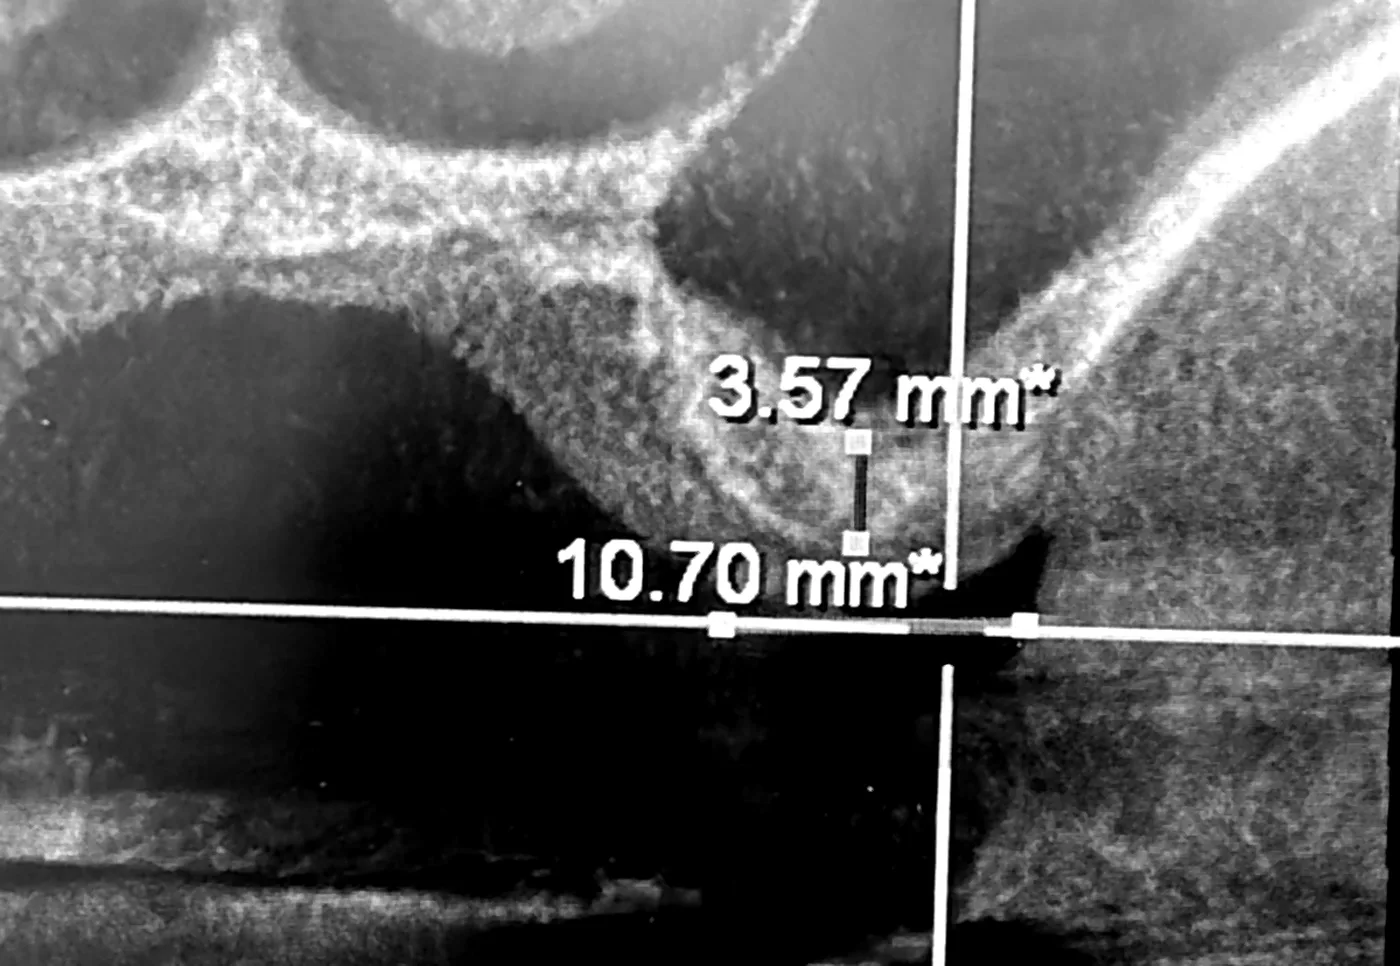 Bone height Bone width Step 2 · Cross-section
Bone width is very good, bone height not very good.
A cross-section of the bone, to demonstrate the lack of bone height and therefore the need for a sinus lift bone graft.
- Implant Bone graft Step 3 · Just done
The implant, and the new bone graft
Done with a synthetic resorbable material. The white circle of granules above the implant is the new bone graft material.
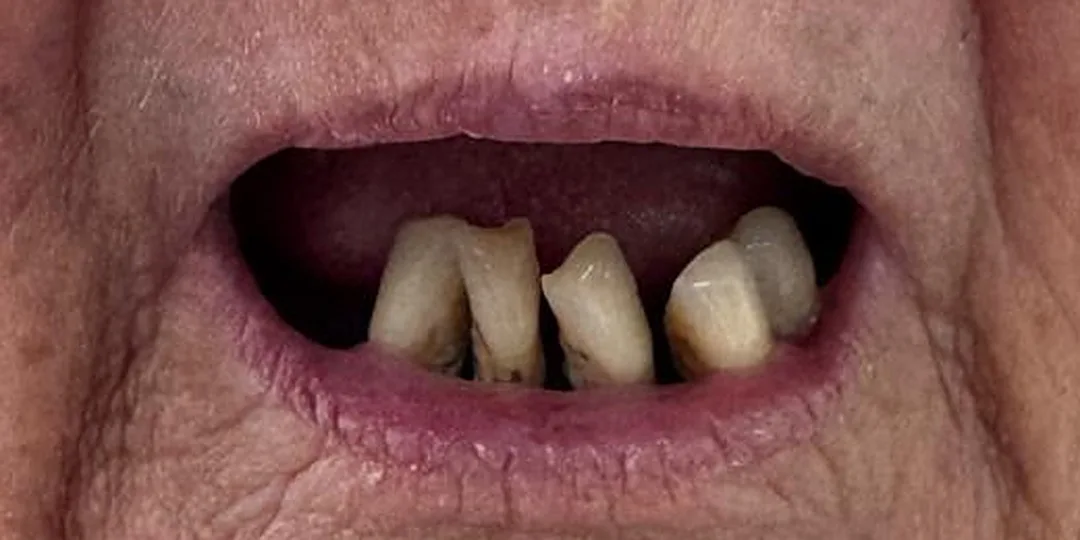
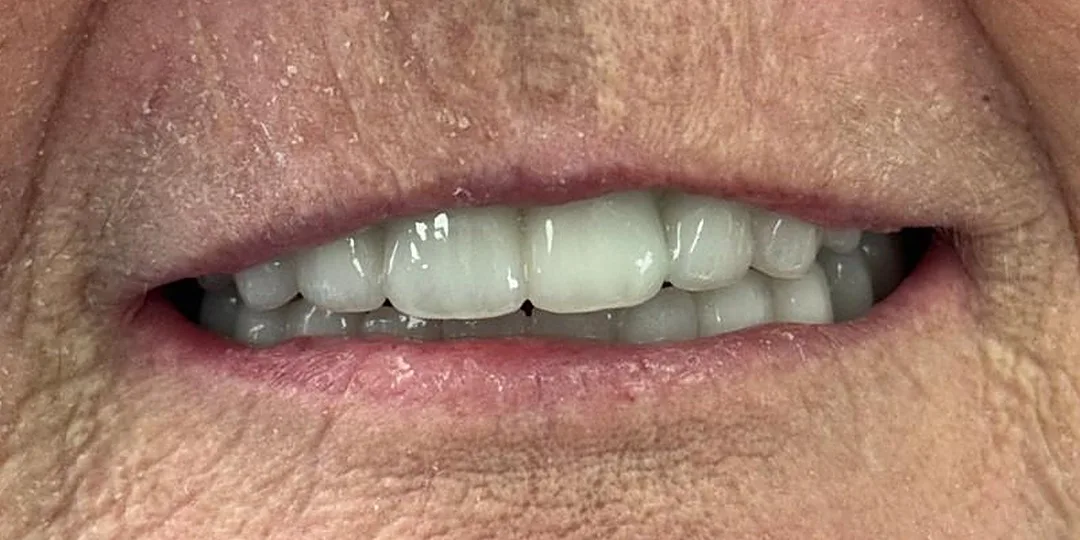
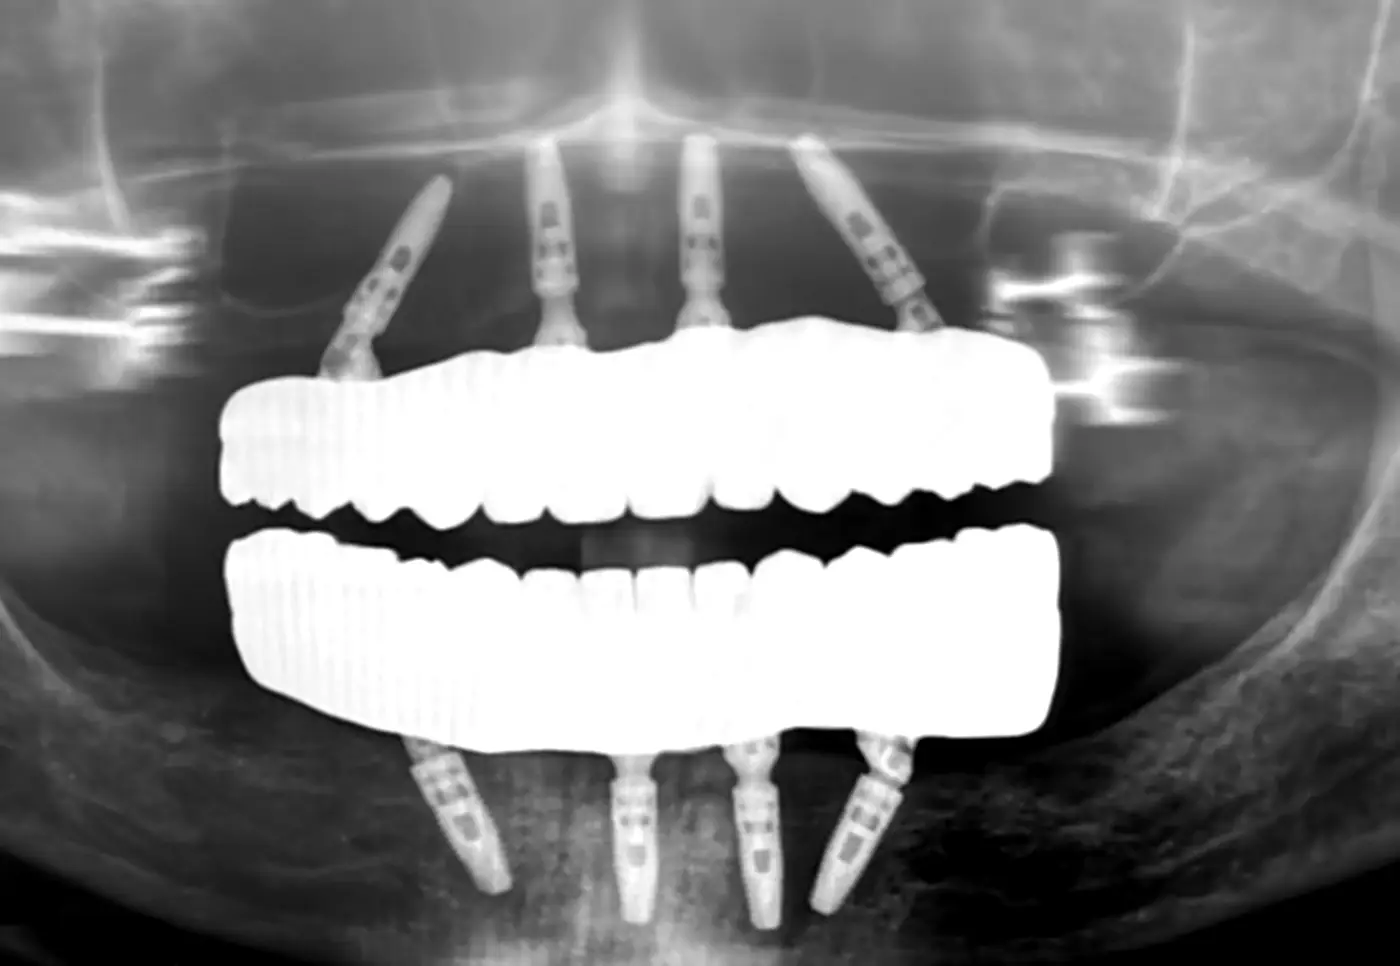
All-on-4, upper and lower.
See all three steps Hide the steps
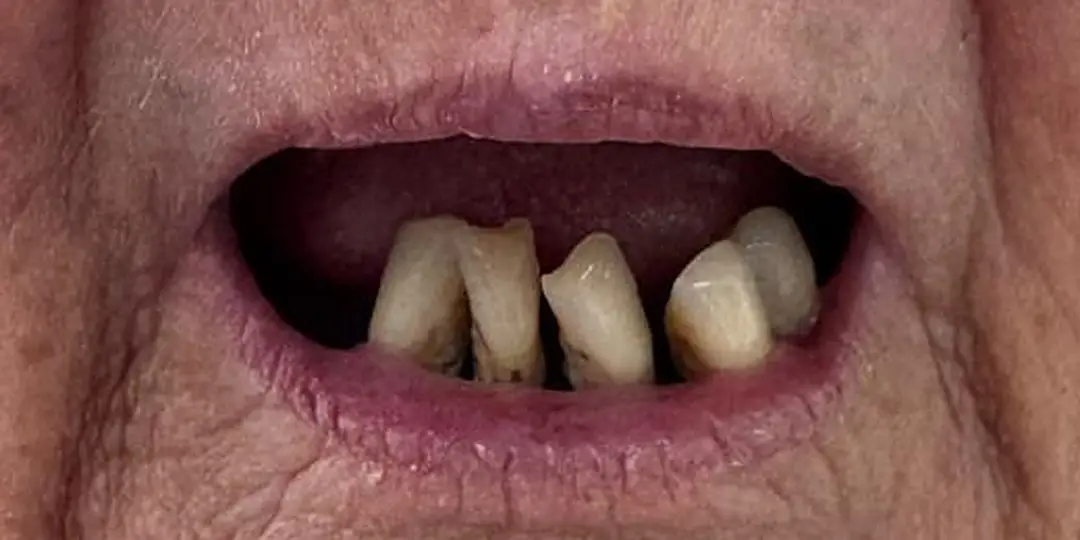
- Step 1 · Before
The starting point
All-on-4, or same-day teeth, can be an excellent option for people who have no teeth at all, and equally for people who still have a few teeth that are loose, decayed, severely worn down or broken.
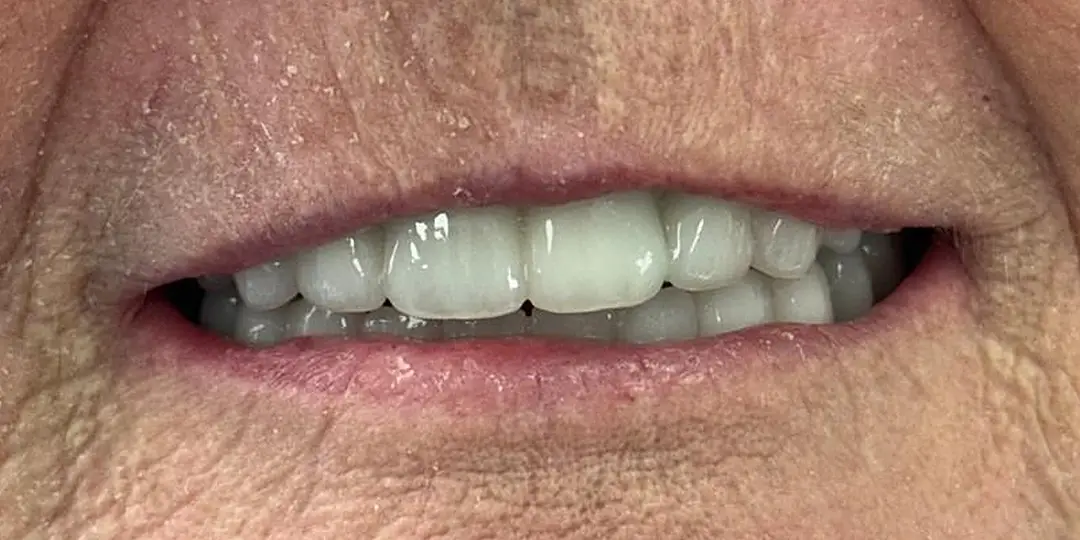
- Step 2 · After
The final bridge
All-on-4 is a trade name. It stands for all of the teeth in one jaw, on four implants.
-
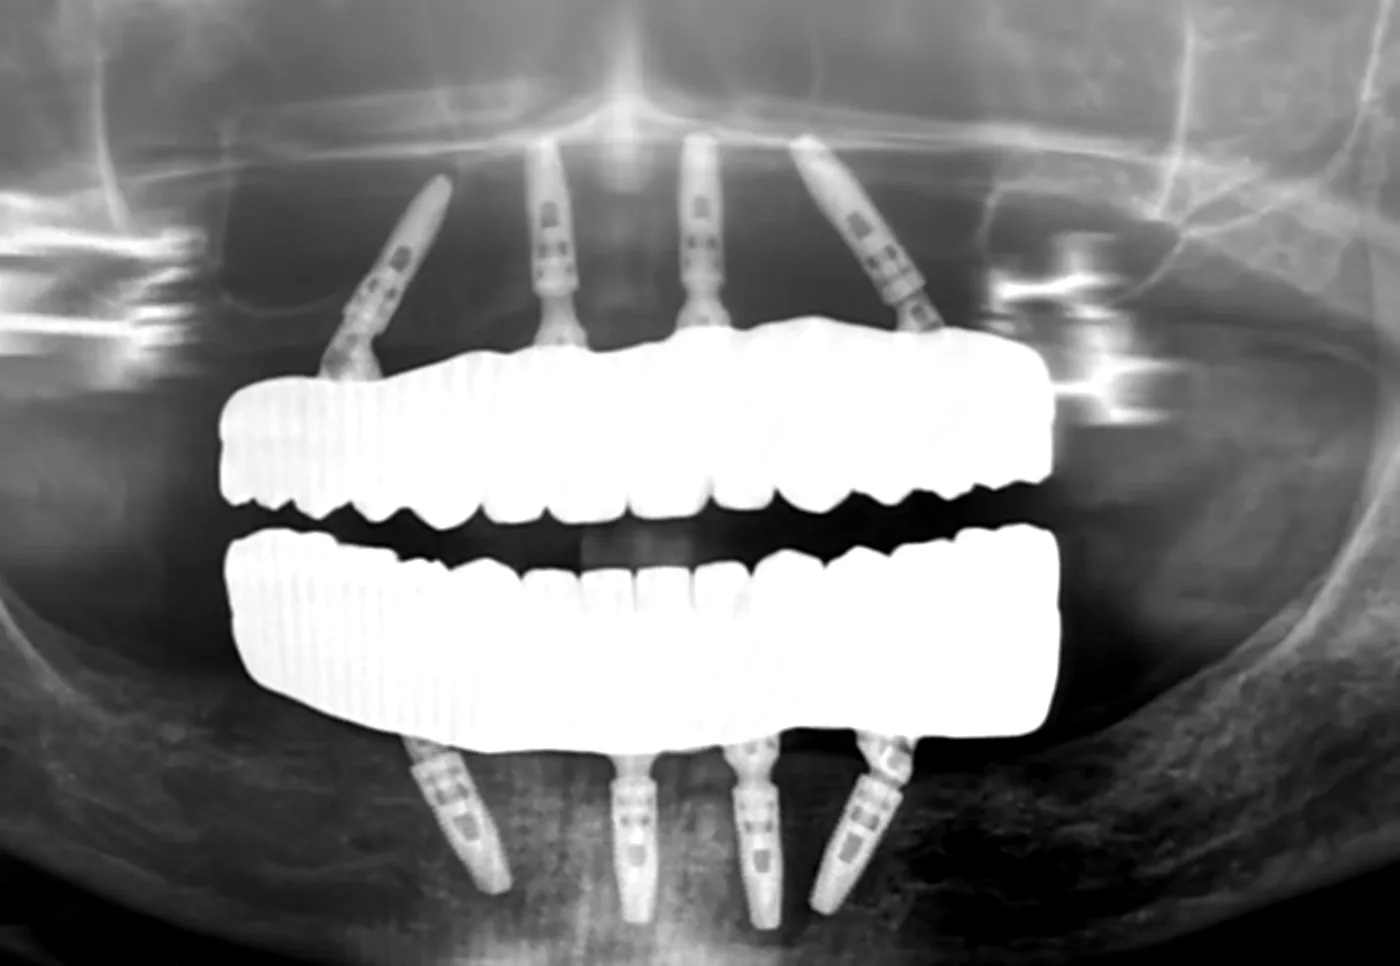 Tilted implants Step 3 · The X-ray
A graftless approach
Avoiding bone grafting by tilting the back implants to avoid areas.
Tap or click either photo to enlarge.
Not implants — a ten-tooth bridge across the upper arch.
We took out the big two front teeth and then reshaped the other teeth and fitted a ten-tooth bridge across there.
More stories are being gathered — with each patient's permission.
If you would like to speak to someone who has had the treatment you are considering, ask at your consultation and we will see what we can arrange.